Composting: Benefits and Your 7-Day Start Guide
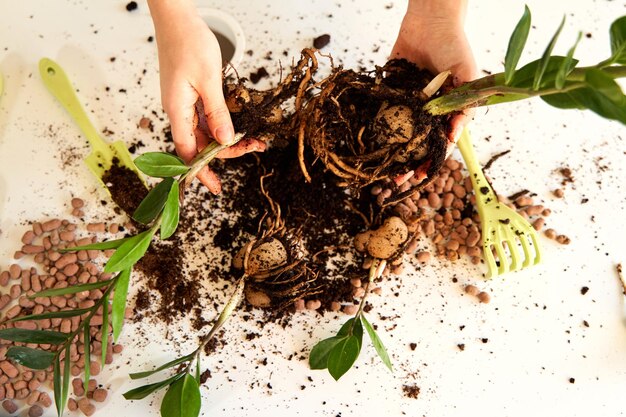
Composting, a natural process of recycling organic matter into nutrient-rich soil amendment, offers significant environmental benefits, including waste reduction and improved soil health, and can be initiated effectively within just seven days with basic steps and readily available materials.
Are you curious about how to make a tangible difference for the environment right from your backyard? Do you wonder what are the benefits of composting and how to start in 7 days? Composting is a surprisingly simple yet profoundly effective way to transform organic waste into a valuable resource, benefiting both your garden and the planet. This guide will walk you through its advantages and provide a clear, actionable plan to begin your composting journey this week.
The transformative power of composting for a greener world
Composting is more than just throwing your food scraps into a bin; it’s a dynamic, natural process that recycles organic material into a dark, rich, and earthy substance known as compost or “black gold.” This amazing soil amendment improves soil structure, enhances fertility, and reduces the need for chemical fertilizers. Understanding its fundamental benefits is the first step towards appreciating its true value and adopting this sustainable practice.
Reducing landfill waste and greenhouse gas emissions
One of the most immediate and impactful benefits of composting is its role in diverting organic waste from landfills. When food scraps and yard waste are sent to landfills, they decompose anaerobically (without oxygen), producing methane, a potent greenhouse gas that contributes significantly to climate change. By composting, you enable aerobic decomposition, which produces carbon dioxide—a less harmful greenhouse gas—and significantly reduces methane emissions. This direct action helps mitigate global warming and promotes a healthier atmosphere. Every pound of organic waste you compost is a pound less contributing to landfill methane and a step towards a more sustainable waste management system.
Enhancing soil health and fertility
Compost acts as a natural soil conditioner, enriching it with essential nutrients and beneficial microorganisms. Unlike synthetic fertilizers that provide only a few specific nutrients, compost offers a wide spectrum of macro- and micronutrients in a slow-release form, ensuring continuous nourishment for plants.
- Improved soil structure: Compost lightens heavy clay soils, improving drainage and aeration, and adds body to sandy soils, enhancing water retention.
- Increased nutrient availability: It helps unlock nutrients already present in the soil, making them more accessible to plant roots.
- Suppression of plant diseases: Healthy, microbe-rich compost can help suppress common plant diseases and pests.
- Reduced need for chemical fertilizers: Regular use of compost can significantly decrease or eliminate the need for synthetic fertilizers, protecting local waterways from nutrient runoff.
This holistic approach to soil health fosters robust plant growth and resilience, creating a thriving garden ecosystem.
Conserving water and economic benefits
Compost significantly improves the soil’s water-holding capacity. In sandy soils, compost acts like a sponge, holding onto water molecules that would otherwise drain away quickly. In clay soils, it helps to break up the dense structure, allowing water to penetrate more effectively rather than running off. This enhanced water retention means plants need less frequent watering, leading to substantial water savings, particularly in drought-prone areas or during dry spells. Beyond the environmental advantages, composting also offers considerable economic benefits. By producing your own nutrient-rich soil amendment, you reduce or eliminate the need to purchase synthetic fertilizers, potting mixes, and even some pest control products. This saves money on gardening supplies and contributes to a more self-sufficient and economical gardening practice.
Getting started: essential components for your compost pile
Embarking on your composting journey requires an understanding of the basic ingredients, often referred to as “greens” and “browns.” The success of your compost pile hinges on maintaining the right balance between these two categories, along with adequate moisture and aeration.
Understanding greens and browns: the carbon-nitrogen balance
Composting relies on a balanced mix of nitrogen-rich materials (greens) and carbon-rich materials (browns). Greens provide the necessary nitrogen to fuel the microbial activity that breaks down materials, while browns provide the carbon structure for the compost and help maintain aeration.
- Greens (Nitrogen-rich): These are typically moist and fresh materials, such as food scraps (fruit and vegetable peels, coffee grounds, tea bags), grass clippings, and fresh garden trimmings. They heat up the pile and promote decomposition.
- Browns (Carbon-rich): These are usually dry and woody materials, including fallen leaves, straw, wood chips, shredded paper, cardboard (torn into small pieces), and sawdust. They provide structure, prevent compaction, and absorb excess moisture from greens.
A good rule of thumb is to aim for a ratio of approximately 2-3 parts browns to 1 part greens by volume. This ratio ensures an optimal environment for the microbes to flourish, preventing odors and promoting efficient decomposition.

Choosing your composting method and bin
There are several ways to compost, ranging from simple piles to sophisticated systems. The best method for you will depend on your space, budget, and the amount of organic waste you generate.
- Compost Pile: The simplest method for those with ample outdoor space. Materials are simply stacked in a pile. It’s effective but can take longer and may attract pests if not managed well.
- Compost Bin: A contained structure made of wire, wood, or plastic. Bins help contain the pile, retain heat, and can be easily turned. They are ideal for backyard composting and come in various sizes and designs.
- Tumbling Composter: A sealed drum-like container that rotates, making it easy to mix and aerate the compost. These are great for smaller spaces, faster composting, and deterring pests.
- Vermicomposting (Worm Composting): Uses specific types of worms (red wigglers) to break down food scraps indoors or in shaded areas. Ideal for small apartments or those who want to compost food waste exclusively.
Consider your needs and limitations before investing in a system. Even a simple DIY bin made from repurposed materials can be highly effective.
Tools and supplies: what you’ll need
While composting can be done with minimal equipment, a few tools can make the process easier and more efficient.
- Compost Bin or Structure: As discussed above, this is your primary container.
- Pitchfork or Composting Fork: Essential for turning and aerating your pile, which speeds up decomposition and prevents anaerobic conditions.
- Watering Can or Hose: To maintain the ideal moisture level, ensuring the pile stays consistently damp, like a wrung-out sponge.
- Shredder (Optional): A garden shredder can break down larger woody materials, increasing their surface area and accelerating decomposition.
- Gloves: Protect your hands when handling materials.
- Kitchen Scrap Collector: A small, lidded container for collecting daily kitchen scraps before adding them to the main compost bin.
Having these basic tools ensures a smooth and efficient composting process, allowing you to manage your organic waste effectively.
Your 7-day composting kickstart plan
The idea of composting in 7 days might seem ambitious, but it’s entirely possible to set up a functional system and start adding materials within a week. This timeline focuses on getting your compost bin or pile established and ready for consistent use.
Day 1-2: Research and gathering materials
Begin your composting journey by dedicating the first two days to essential planning and preparatory steps. This initial phase sets the foundation for a successful and efficient composting system.
- Research and choose your method: Consider your space and the volume of waste you generate. Decide between a simple pile, a purchased bin, a tumbler, or vermicomposting.
- Gather your “browns”: Start collecting carbon-rich materials. Look for fallen leaves (if in season), wood chips, straw, shredded paper (newspaper, cardboard without glossy finishes), and dry plant stalks. Having a good supply of browns on hand is crucial for balancing your compost pile.
- Identify a composting spot: Choose a well-drained area in your yard that is away from your house, has good air circulation, and is ideally in partial shade to prevent excessive drying out.
This methodical approach ensures you have a clear plan and the necessary initial resources before you even begin building your compost setup.
Day 3-4: Building your compost system
With your site chosen and materials gathered, days 3 and 4 are dedicated to constructing or assembling your chosen composting system. This is where your planning turns into action.
- Assemble or build your bin: If you purchased a bin, follow the manufacturer’s instructions. For a DIY bin (e.g., from pallets or wire mesh), construct it according to your design. Ensure it’s sturdy and has sufficient aeration.
- Create a base layer: Lay down a 4-6 inch layer of coarse “brown” materials at the bottom of your bin. This initial layer ensures good drainage and aeration, preventing the base of your pile from becoming waterlogged.
- Start collecting “greens”: Begin collecting kitchen scraps like fruit and vegetable peels, coffee grounds, and tea bags in a dedicated container with a lid. Having a small kitchen compost pail makes this easy and less messy.
By the end of day 4, your composting system should be physically ready to receive organic materials, with the foundation laid for proper decomposition.
Day 5-6: Initial layering and moisture check
These days are about actively building your compost pile with the right balance and ensuring proper moisture levels, which are critical for microbial activity.
- Add your first layers: Start layering your “greens” and “browns” into the bin. A common technique is to add a thin layer of greens (e.g., kitchen scraps) on top of your brown base, followed by a thicker layer of browns. You can also mix them as you add them. Aim for the recommended 2-3 parts browns to 1 part greens.
- Moisten as you go: As you add each layer, lightly water it. The compost pile should be consistently damp, like a wrung-out sponge—moist but not soggy. Use your watering can to gently sprinkle water over the layers.
- Monitor the smell: A well-balanced compost pile will have an earthy, pleasant smell. If it smells putrid (like rotten eggs), it’s too wet and needs more browns and aeration. If it smells ammonia-like, it has too much nitrogen (greens) and needs more browns.
Consistency in layering and moisture ensures that the microorganisms have the optimal conditions to begin their work, converting your waste into valuable compost.
Day 7: First turn and ongoing maintenance plan
Your first week culminates in an important step: the initial turning of your compost pile and establishing a routine for ongoing maintenance. This day marks the official start of active composting.
- Turn your pile: Using your pitchfork, turn the materials in your compost bin, mixing the outer layers into the center and vice versa. This aerates the pile, distributes moisture, and ensures even decomposition. For new piles, turning isn’t strictly necessary on day 7, but it’s good practice to get into the habit, especially if you’re aiming for faster results.
- Establish a feeding schedule: Decide on a regular schedule for adding new materials. Many people add kitchen scraps daily or every few days, topping each addition with a layer of browns.
- Plan for regular turning: Aim to turn your compost pile every week or two. More frequent turning (every few days) will speed up the process, while less frequent turning (monthly) will slow it down but is still effective.
- Continue monitoring moisture: Check the moisture level regularly, especially during dry periods. Add water if the pile feels dry.
By the end of Day 7, you’ll have a fully operational composting system and a clear understanding of the ongoing steps needed to maintain it. You’re now actively participating in reducing waste and enriching your environment.
Troubleshooting common composting challenges
Even with the best intentions, you might encounter a few hiccups on your composting journey. Knowing how to address common issues can save you frustration and keep your pile healthy and productive.
Odor and pests: identifying and resolving issues
Unpleasant odors and the presence of pests are common indicators that something in your compost pile is out of balance. These issues are almost always preventable and easily rectifiable with a few adjustments.
- Foul Odors: A putrid, rotten-egg smell usually means your pile is too wet and lacks oxygen. Add more dry “browns” (shredded paper, dry leaves) to absorb excess moisture and turn the pile vigorously to introduce air. An ammonia-like smell indicates too much nitrogen (“greens”). Balance this by adding more “browns.”
- Flies and other insects: While some insects are part of the decomposition process, excessive numbers of fruit flies or house flies often signal exposed food scraps. Ensure all new “greens” are buried deep within the pile or covered with a layer of “browns.” Avoid adding meat, dairy, or oily foods, which attract rodents and larger pests.
- Rodents: If rats or mice become an issue, it’s usually because attractive food scraps are accessible. Use a completely enclosed compost bin, avoid adding meat/dairy, and ensure kitchen waste is thoroughly mixed into the center of the pile.
Promptly addressing these issues creates a healthier, odor-free, and less attractive environment for unwanted visitors, making your composting experience more pleasant.
Slow decomposition and extreme temperatures
A compost pile that isn’t breaking down effectively or shows temperature extremes needs a bit of intervention to kickstart the microbial activity.
- Slow Decomposition: If your pile isn’t heating up or breaking down quickly, consider these factors:
- Lack of nitrogen: Add more “greens” (food scraps, fresh grass clippings) to fuel microbial growth.
- Too dry: The pile needs to be consistently moist. Add water while turning until it feels like a damp sponge.
- Lack of aeration: Turn your pile more frequently (at least once a week) to introduce oxygen. Anaerobic conditions slow decomposition.
- Material size: Large pieces of organic matter break down slowly. Chop or shred materials into smaller pieces (1-2 inches) before adding them to the pile.
- Extreme Temperatures:
- Pile too cold: Often due to lack of nitrogen or insufficient moisture. Add more greens and water, then turn the pile. Small piles may also struggle to generate enough heat; consider consolidating materials or using an insulated bin.
- Pile too hot/drying out: Rarity, but if the pile feels excessively hot or starts to dry out, it might be due to too much concentrated nitrogen or lack of moisture. Add more browns and water, and turn to redistribute heat and moisture evenly.
Regular observation and simple adjustments based on these guidelines will help maintain optimal composting conditions, leading to faster and more efficient decomposition.
Beyond the bin: utilizing your finished compost
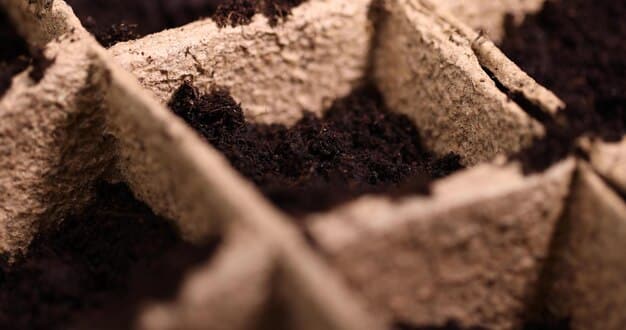
The culmination of your composting efforts is the rich, dark, nutrient-dense material known as humus or finished compost. This “black gold” is a versatile and invaluable resource for your garden and landscape. Understanding how to use it effectively is key to maximizing its benefits.
How to identify finished compost
Knowing when your compost is ready is crucial for its effective use. Finished compost will exhibit several distinct characteristics. It should be:
- Dark brown or black: Its color will resemble rich, dark earth.
- Crumbly texture: It should have a fine, crumbly, and uniform texture, free of recognizable food scraps or plant materials, except for perhaps some stubborn woody fragments.
- Earthy smell: It will have a pleasant, earthy, forest floor smell, distinct from the smell of fresh organic waste. There should be no offensive odors.
- Cool to the touch: Active compost piles generate heat, but finished compost will be cool to the touch, indicating that the intense microbial activity has subsided.
If you still see recognizable food scraps or plants, it means the decomposition process is still ongoing. You can either let it “cure” further or use it for specific purposes where some larger pieces are acceptable.
Effective uses for your homemade compost
Once your compost is ready, the possibilities for its application are vast and beneficial for almost any gardening endeavor.
- Soil amendment: The most common use. Mix 1-2 inches of compost into the top 4-6 inches of your garden beds before planting flowers, vegetables, or shrubs. This enriches the soil, improves its structure, and provides a slow release of nutrients.
- Top dressing: Spread a thin layer (1/2 to 1 inch) of compost over established lawns or garden beds. This acts as a slow-release fertilizer and helps retain moisture.
- Potting mix: For container gardening, mix 1 part compost with 2-3 parts sterile potting soil or sand to create a nutrient-rich and well-draining medium. Avoid using 100% compost in pots as it can be too rich and compact.
- Starting seeds: A small amount of fine, sifted compost can be added to seed-starting mixes to provide gentle nutrients. However, it’s best to use commercially prepared seed-starting mixes for delicate seedlings to ensure sterility and proper drainage.
- New plantings: When planting trees, shrubs, or perennials, mix compost with the excavated soil before backfilling the planting hole. This gives new plants a healthy start.
- Compost tea: Steep a handful of compost in water for a day or two to create a nutrient-rich liquid feed for plants.
By incorporating your finished compost throughout your garden, you create a healthier, more resilient ecosystem that thrives naturally, reducing your reliance on external inputs and closing the loop on your organic waste.
| Key Point | Brief Description |
|---|---|
| 🌿 Waste Reduction | Composting significantly diverts organic waste from landfills, reducing methane emissions. |
| 💰 Economic Savings | Reduces need to buy fertilizers and soil amendments, saving gardening costs. |
| 💧 Water Conservation | Improves soil’s water retention, potentially reducing irrigation needs. |
| 🌱 Soil Enrichment | Provides essential nutrients and enhances soil structure for healthier plants. |
Frequently asked questions about composting
Avoid adding meat, bones, dairy products, oily foods, pet waste, diseased plants, and chemically treated wood. These materials can attract pests, create foul odors, introduce pathogens, or harm beneficial microorganisms, hindering the composting process and making the end product unsafe or unhealthy for your garden.
The composting timeline varies significantly, ranging from as little as two weeks to several months, depending on factors like pile management, material size, and environmental conditions. Hot composting (regular turning, ideal moisture, balanced greens/browns) can yield finished compost in 2-3 months, while passive or cold composting takes 6-12 months.
Yes, composting in small apartments or indoors is entirely possible. Vermicomposting, using an indoor worm bin, is a popular and effective method for processing food scraps with minimal odor and space. Bokashi composting, an anaerobic fermentation process, is another indoor option that pickles food waste before it’s buried or added to a traditional compost pile.
The ideal moisture level for a compost pile is comparable to a wrung-out sponge—damp but not soaking wet. Too little moisture slows decomposition, while too much can lead to anaerobic conditions and foul odors. Regularly check by squeezing a handful; if a few drops appear, it’s about right. Add non-chlorinated water if too dry, or more browns if too wet.
Turning your compost pile is highly recommended as it introduces oxygen, essential for aerobic decomposition, and helps distribute moisture and heat evenly. While composting can still occur without turning (cold composting), regular aeration significantly speeds up the process, reduces odors, and ensures a more uniform, finished product. Aim to turn at least once a week for faster results.
Conclusion
Composting is a powerful, accessible tool for anyone looking to reduce their environmental footprint, enrich their garden, and embrace a more sustainable lifestyle. From diverting organic waste from overflowing landfills and mitigating harmful greenhouse gas emissions to transforming barren soil into fertile ground, the benefits are profound and far-reaching. By understanding the simple science behind “greens” and “browns” and committing to a few straightforward steps, you can start your own beneficial composting system in as little as seven days. This journey not only provides you with invaluable “black gold” for your plants but also connects you more deeply with the natural cycles of regeneration, proving that even small, consistent actions can lead to significant positive change for our planet.
